 |
 |
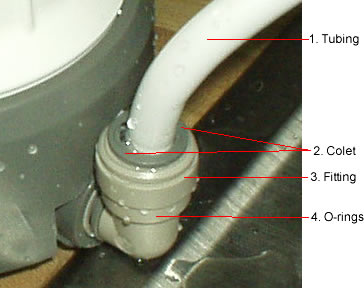
Fig A. (Push-Fit Connections) |
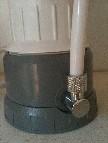
Fig B. (Barbed Elbow Fitting) |
Determine which figure above most resembles your filter and follow either instructions A or B.
Fig A. Instructions
A1. With two fingers, press and hold down the gray colet (2) while pulling the inlet tube (1) out of the fitting (see push-fit instructions). If your filter does not contain an elbow push-fitting and is simply inserted directly into the base, follow these same steps above from the collet on the base fitting.
A2. If your existing tube contained a tube insert (either brass or plastic) which remains stuck in the fitting, you will have to re-press the collet again and pry the insert out with a pair of pliers and then discard.
A3. Insert the new diverter tube into the port until it stops (approx. 3/4" deep) and then pull tubing back insuring that itís properly locked. A4. Turn on the water and inspect for leaks. Fig B. Instructions
B1. Unscrew the nut on top of the barbed elbow fitting and pull off the existing tubing. B2. Cut the end of the existing tubing and remove the nut. B3. Slide the nut over the new diverter tubing. B4. Compress the tubing over the barbed fitting until it reaches the threads B5. Slide the nut down to screw on to the threaded barbed fitting. B6. Screw (clock-wise direction) the barbed elbow fitting back into the filter base. It may help to rotate the filter unit while screwing the fitting in order to prevent the tubing from kinking. B7. Turn on water and inspect for leaks.
To purchase new diverter valve kit>>
|